An accessible elevator is more than a box that travels between floors. It is a dependable route to work, healthcare, education, and daily independence. For wheelchair users, older adults, and people with visual or hearing disabilities, small design choices can determine whether that route feels safe or stressful.
This guide explains How to ensure elevator accessibility for disabled people through seven practical considerations. It examines clear floor space, reachable controls, door timing, handrails, lighting, audio signals, and emergency communication. A wheelchair user should be able to enter without sharp turns, position safely, and reach the control panel without stretching. Raised symbols and Braille can support passengers with limited vision. Clear voice announcements can reduce uncertainty, especially in unfamiliar buildings.
Details matter.
Ronald Mace, a respected universal design expert, said, “The question is not what is wrong with people, but what is wrong with the environment?” His principle remains useful for elevator planning. Accessibility should not depend on personal assistance or luck. It should be built into the journey.
Real-world checks are essential. Test the elevator with different wheelchair sizes, mobility aids, and sensory needs. Watch how doors behave when someone moves slowly. Listen for alarms in a noisy lobby. Some recommendations may need adjustment because buildings, users, and local requirements differ. That uncertainty deserves attention, not dismissal.
A technically compliant elevator may still feel confusing or difficult to use. Honest evaluation can reveal problems that drawings miss. The most reliable approach combines recognized accessibility guidance, professional inspection, and feedback from disabled users.
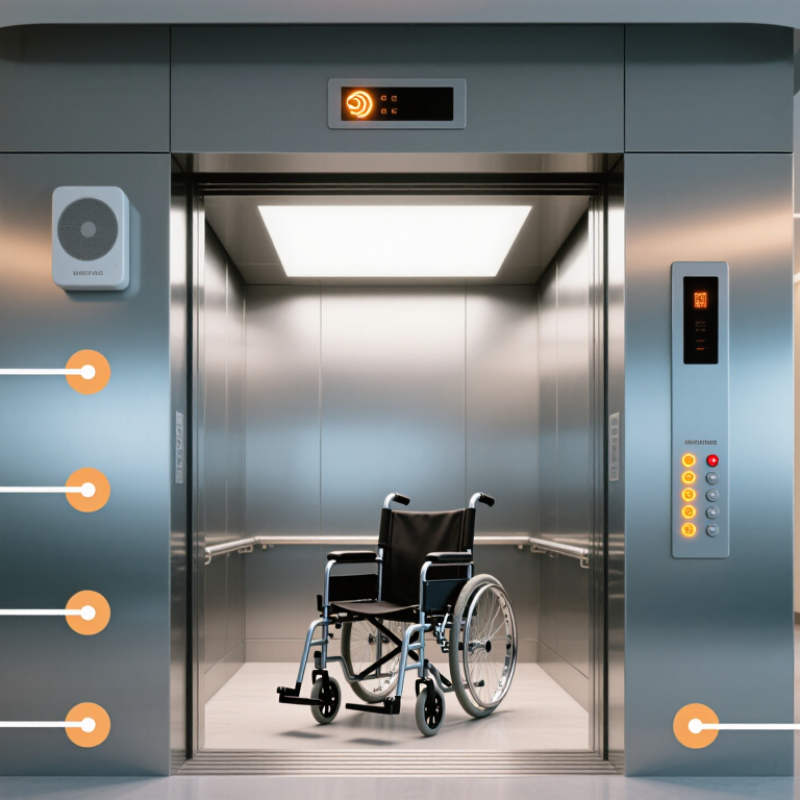
Elevator access begins with understanding different disabilities, not simply installing a lift. Wheelchair users need level entry, turning space, and enough door time. People with low vision depend on tactile controls, contrast, and clear audio announcements. Deaf passengers need visible floor and emergency information. Some users also experience fatigue, balance difficulties, or cognitive stress. The World Health Organization’s Global report on health equity for persons with disabilities (2022) estimates that 1.3 billion people live with significant disability worldwide. That scale makes accessible elevator planning essential. A checklist alone is not enough.
Tip 1: Map a step-free route from the entrance to every elevator. Tip 2: Keep landings clear of bins, furniture, and waiting crowds. Tip 3: Place controls within accessible reach, with raised markings and Braille. Tip 4: Use both visual and audible floor signals. Small details matter.
Tip 5: Check door sensors and reopening speed with mobility devices, walking sticks, and service animals. Tip 6: Make emergency communication usable through text, light signals, and speech. Tip 7: Test the elevator with disabled users, then record faults in a maintenance log. ISO 21542:2021 and EN 81-70:2021 provide useful accessibility guidance, but local requirements may differ. A compliant elevator can still feel unsafe. Real users should challenge the design.
These measurements highlight key accessibility requirements for wheelchair users and people with limited reach. The benchmarks are based on minimum dimensions in the 2010 ADA Standards for Accessible Design, including elevator doors, car size, and operating controls.
Source: U.S. Department of Justice, 2010 ADA Standards for Accessible Design, Sections 407 and 308. Values are shown in millimeters.
Doorway clearance needs careful measurement. Record the clear opening with the door fully open, not the frame width. Confirm that a wheelchair can approach the handle without twisting sharply. Provide enough floor space for turning and repositioning.
Automatic doors should open smoothly and remain open long enough for slower users. Manual doors must not require excessive force. Check thresholds, hinges, and door closers. They often create resistance.
Controls should be reachable, visible, and easy to operate. Avoid placing them behind an inward-swinging door.
Strong contrast helps people identify the doorway and controls. Glare can hide edges and labels. Keep signs readable from the approach route.
Test the entrance with different mobility devices, including a power chair and a walking frame. One test is not enough. A route may meet a written requirement yet still feel stressful.
Review measurements against current local accessibility standards, because requirements vary by location. Recheck the route after renovations, deliveries, or seasonal changes. Small changes can quietly remove access.
Tip 1: Keep control panels reachable. The U.S. Access Board’s ADA Standards specify accessible operating ranges, clear floor space, and tactile characters. Place emergency buttons where seated users can reach them without stretching.
Tip 2: Use raised symbols and Braille with strong contrast. Small labels become difficult in dim cabins.
Tip 3: Separate alarm controls from routine buttons. A raised rim or distinct color can prevent accidental activation.
Tip 4: Provide both visual and audible floor signals. EN 81-70:2021 recommends accessible lift features, including destination information and arrival indicators. A clear voice announcement helps blind passengers, while large illuminated arrows support people with hearing loss. Keep announcements brief. Excessive repetition can create confusion.
Tip 5: Make doors reopen quickly when sensors detect a passenger, mobility aid, or service animal. Sensors should cover low and high positions, not only waist level. Staff should test them with wheelchairs during scheduled inspections.
Tip 6: Ensure the emergency communication system supports two-way speech, visual confirmation, and text-based assistance where available. The World Health Organization reports that about 1.3 billion people, or 16% of the global population, experience significant disability. One emergency method will not fit everyone.
Tip 7: Practice rescue procedures with disabled users and maintenance teams. Check lighting, alarm volume, backup power, and instructions. A perfect checklist still misses real human behavior; observing an actual wheelchair user may reveal a poorly placed button or confusing signal.
Elevator entry and exit can become risky when door timing, crowding, or poor visibility creates uncertainty. The World Health Organization estimates that 1.3 billion people live with significant disabilities worldwide. Safe elevator design must therefore support varied movement, balance, and sensory needs. A wheelchair user may need extra seconds to align with the car floor. A person using a cane may not notice a small level gap.
The World Health Organization estimates that 1.3 billion people live with significant disabilities worldwide.
Tip 1: Pause before entering.
Check the floor edge, door movement, and available space. Keep the doorway clear. Do not rush behind another passenger.
Tip 2: Enter straight and position mobility devices away from the doors.
A caregiver should avoid blocking the control panel.
Tip 3: During exit, allow disabled passengers to leave first when space is tight.
Face the opening and move slowly.
The U.S. Access Board’s ADA Standards require accessible elevator clearances, controls, and door operation, but compliant dimensions cannot prevent every real-world mistake.
Maintenance teams should inspect door sensors, floor leveling, audible signals, and emergency communication systems. The U.S. Bureau of Labor Statistics reports that falls remain a major source of workplace injuries, which reinforces the value of small prevention steps. Staff training matters too. A rushed employee may close the doors too quickly. That should be reviewed, not ignored. Clear lighting, contrasting floor edges, and spoken floor announcements can reduce hesitation. Yet users still need time. Safety improves when elevator operation respects human variation, not only technical measurements.
An accessible elevator needs more than wide doors and visible buttons. Regular inspections keep those features dependable for wheelchair users, older passengers, and people with limited vision or hearing. Maintenance teams should check door timing, sensor response, floor leveling, handrails, lighting, and button height. Small faults matter.
Inspectors should test the emergency alarm and two-way communication system, not merely press each button. The voice must be clear, and visual signals should work in noisy conditions. Check tactile markings, raised characters, and audible floor announcements during every scheduled visit. A technician should also examine backup power, door edges, and the elevator’s stopping accuracy. Even a small floor gap can create a real hazard.
Use a written checklist, record each defect, and assign a repair deadline. Qualified technicians should follow applicable accessibility and safety standards. Staff can also observe the elevator during busy periods, when crowding exposes problems that a quiet test misses. Clean equipment helps, but cleanliness does not prove accessibility. No checklist catches everything. Passenger feedback may reveal a confusing button layout or a delay that inspection data overlooks. Maintenance plans should change when those patterns appear, even if the elevator technically passes.
| No. | Accessibility Area | Inspection Focus | Recommended Interval | Practical Acceptance Check | Priority |
|---|---|---|---|---|---|
| 1 | Clear Entrance and Hallway Access | Check that the route to the elevator is level, unobstructed, well lit, and free from temporary storage, raised thresholds, or loose floor coverings. | Daily visual check; formal inspection monthly. | A wheelchair or mobility aid can approach, enter, and leave the landing without blocked maneuvering space. | High |
| 2 | Door Width and Door Operation | Inspect door movement, reopening devices, sensors, closing force, noise, and alignment. Keep door tracks clean and free of debris. | Daily operational check; technician inspection monthly or according to local code. | Doors open fully, remain open long enough for safe entry, and reopen when a person or mobility device crosses the detection zone. | Critical |
| 3 | Control Panel Reachability | Check that buttons are reachable from a seated position, clearly labeled, securely mounted, and easy to activate without excessive force. | Monthly functional check; after any panel or interior refurbishment. | All floor buttons respond reliably, labels remain legible, and raised or tactile markings are present where required by applicable standards. | High |
| 4 | Audible and Visual Information | Test floor indicators, direction arrows, arrival tones, voice announcements, alarm signals, and emergency lighting. | Monthly test; immediately after electrical or control-system work. | Passengers can identify the elevator direction, current floor, arrival, and emergency status through visual and audible information. | High |
| 5 | Leveling Accuracy and Floor Gaps | Observe stopping accuracy at every served floor and inspect the sill, landing, and car-floor transition for trip hazards. | Monthly observation; record results during every scheduled service visit. | The car stops substantially level with the landing and does not create a hazardous vertical or horizontal transition. | Critical |
| 6 | Handrails, Flooring, and Interior Safety | Inspect handrails, floor traction, mirrors or visibility aids, wall protection, seating where provided, and loose or sharp components. | Monthly visual inspection; clean and repair as soon as defects are found. | Handrails are secure, flooring is slip-resistant and intact, and no protruding or unstable component interferes with mobility. | Medium |
| 7 | Emergency Communication and Maintenance Records | Test the emergency communication device, alarm button, two-way communication, backup lighting, inspection certificate, and defect log. | Monthly communication test; formal safety inspection at the interval required by local regulations. | A trapped passenger can summon assistance, receive a response, and access clear instructions. All defects have an owner and documented correction date. | Critical |
Keep them reachable from seated positions. Users should not stretch or twist to press a button. Leave clear floor space nearby.
Use raised symbols, Braille, and strong color contrast. Tactile labels help in dim cabins. Small print alone may fail.
Separate alarm controls from routine buttons. Use a raised rim or a noticeably different color. Test the layout with real users.
Provide both visual and audible floor signals. Use large arrows and short voice announcements. Too much repetition can confuse passengers.
Sensors should detect low and high obstacles. Doors should reopen quickly. Test them with wheelchairs during planned inspections.
It should support two-way speech, visual confirmation, and text assistance when available. One communication method cannot serve everyone.
Practice with disabled users and maintenance staff. Check lighting, alarm volume, backup power, and instructions. A checklist may still miss human behavior.
Pause and inspect the floor edge, moving doors, and available space. Enter straight. Do not rush behind another passenger.
Keep the doorway clear and place mobility devices away from doors. When space is tight, let disabled passengers exit first. Move slowly.
Inspect door sensors, floor leveling, lighting, audible signals, and emergency communication. Review rushed staff behavior too. Small delays can prevent serious mistakes.
How to ensure elevator accessibility for disabled people begins with understanding the different needs of passengers, including wheelchair users, people with limited mobility, and those with visual or hearing impairments. Accessible routes should provide a clear, level path to the elevator, while entrances and doorways must offer enough space for safe movement. Controls should be easy to reach, clearly marked, and supported by visual and audible signals. Emergency buttons, alarms, and communication systems should also be positioned and designed for varied abilities.
Safety continues during entry and exit. Passengers should have enough time to board, and doors should reopen when an obstruction is detected. Good lighting, non-slip flooring, handrails, and accurate floor leveling can reduce risks. Regular inspections are essential to confirm that doors, controls, alarms, lighting, and accessibility features work properly. Prompt repairs, routine cleaning, and feedback from disabled users help keep elevators reliable, welcoming, and safe for everyone.

Ascom Elevator