2026 Best Ways to Control Noise and Vibration in Elevators

Time:2026-11-04 Author:Charlotte
0%

Elevator noise is more than an annoyance; it can signal friction, loose components, poor isolation, or changing operating conditions. A low rumble beside a bedroom, a sharp door impact, or a brief shudder between floors may have different causes. Treating every sound with the same fix can waste time. Good diagnosis starts with location, timing, and operating state. Note whether the noise occurs during travel, leveling, door movement, or while the car is idle. Compare those observations with maintenance records and manufacturer guidance. Small details matter.

How to control noise and vibration in elevators begins with identifying the source, not adding insulation blindly. A qualified elevator technician can inspect guide rails, rollers, door operators, bearings, machine mounts, and related equipment. Sound-level readings and vibration measurements can help establish a baseline and show whether a change improves performance. Correct alignment, suitable lubrication, secure fasteners, and properly isolated machinery may reduce unwanted noise. Building structure also matters: vibration can travel through a shaft wall or floor and appear far from its source. That can be surprising.

This guide explores practical control methods, from routine adjustments to acoustic improvements, while noting when specialist assessment is appropriate. Results depend on the elevator design, building construction, and maintenance history. No single treatment works everywhere. Even a careful plan can miss a hidden cause, so measurements and follow-up checks are important.
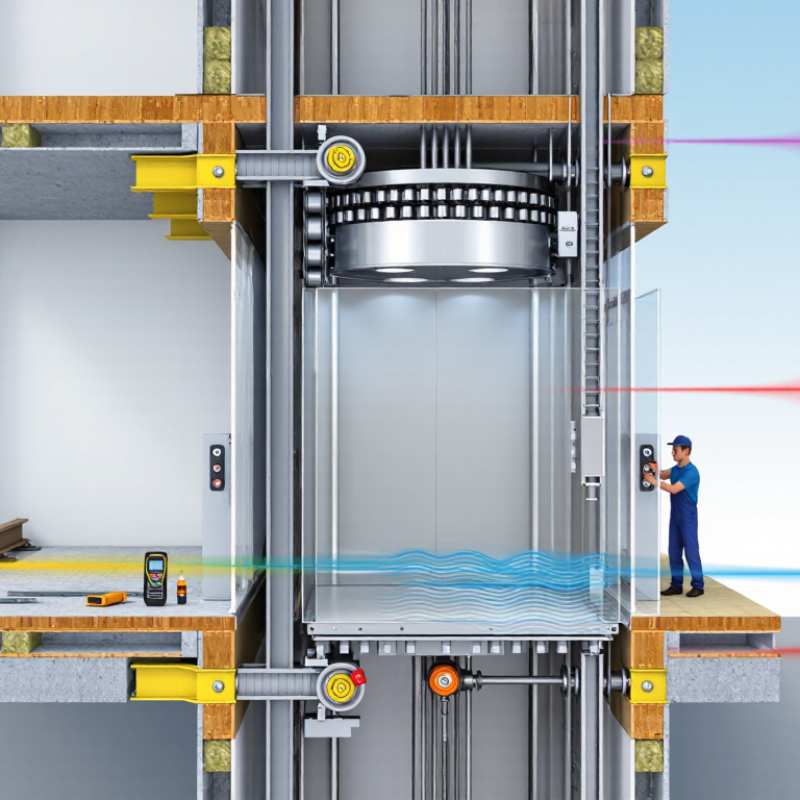
2026 Best Ways to Control Noise and Vibration in Elevators

Common Sources of Elevator Noise and Vibration

Elevator noise often begins at the machine, but the sound alone rarely identifies the cause. Worn bearings may produce a steady hum or rough whine near the drive equipment. A brake that releases unevenly can add a short scrape or clunk at each start. Loose fasteners and poorly aligned rotating parts may increase vibration, especially during acceleration. These signs deserve inspection; they do not prove a single component has failed.

The shaft creates its own clues. Guide rails with uneven joints, loose brackets, or poor alignment can make the car shudder as it passes. Worn rollers may add a repeating rumble. Door tracks and rollers are another common source: dirt, damaged rollers, or a misadjusted door can cause rattling and scraping at every floor. Small sounds add up.

Noise can also travel through the building. Vibration from the machine or rail supports may pass into walls and floors, making a nearby room seem louder than the elevator itself. Air movement in the shaft can produce whistles, while panels inside the car may buzz when lightly secured. Record when the sound occurs, where it is strongest, and whether the car is loaded or moving. That detail helps technicians distinguish a door issue from a machine or rail problem. A quick guess is tempting, but intermittent noise can be harder to trace than a constant one.

2026 Best Ways to Control Noise and Vibration in Elevators

Common Sources of Elevator Noise

Bars show approximate noise ranges in dBA; actual readings vary with elevator design, condition, load, building structure, measurement position, and background noise. Door adjustment and maintenance, rail and roller inspection, vibration isolation, and secure machine mounting can help reduce noise and vibration.

Methods for Diagnosing Elevator Noise and Vibration

Diagnosing elevator noise and vibration starts with a repeatable ride, not a guess from the lobby. Record the car’s load, direction, floor range, and operating conditions. ISO 18738-1:2012 describes methods for measuring and reporting lift ride quality, including vibration and sound. Use a calibrated sound meter and accelerometer, and note where each reading occurs. A phone recording can help locate a rattle, but it cannot replace calibrated measurements.

Compare results across several trips. A thump near the same floor may point to a guide-rail joint or track issue; a rising whine during travel may warrant checking the drive system. These clues are not diagnoses by themselves. Measure in the car and in nearby rooms, with doors open and closed, while distinguishing machinery noise from structure-borne vibration. The WHO’s 2009 Night Noise Guidelines recommend indoor bedroom levels below 30 dB LAeq over eight hours for good sleep. That is a sleep-health reference, not an elevator acceptance limit. Keep that distinction clear. Readings can also change with building structure and microphone placement, so even careful measurements may leave some uncertainty.

Mechanical Adjustments That Reduce Noise at Its Source

2026 Best Ways to Control Noise and Vibration in Elevators
Mechanical Adjustments That Reduce Noise at Its Source

Elevator noise often starts with small mechanical problems, not a single dramatic fault. A dry guide shoe can squeak as the car passes a landing. Worn rollers may create a low rumble that changes with speed. Small changes matter. A qualified technician can inspect rail alignment, shoe or roller condition, and lubrication against the equipment’s specifications. Adding lubricant without checking the component can attract dirt or hide wear.

Loose fasteners on rail brackets, machine frames, or door operators can amplify vibration through the building structure. Technicians should check mounting points and tighten them to the specified torque, rather than simply adding force. Door noise also deserves attention: worn rollers, poor track alignment, or a misadjusted operator can cause repeated rattling at each floor. Listen at several landings; one noisy entrance may point to a local issue.

For machine-room equipment, worn bearings or misaligned drive components can produce persistent hum or vibration. Proper alignment and balanced rotating parts may help, while suitable isolation mounts can reduce vibration transfer into the structure. These fixes are not interchangeable. A mount that is too soft may create movement rather than quiet operation. Sound can also travel in unexpected ways, so measurements before and after work are useful. The first diagnosis may be wrong; verify the change under normal operating conditions.

Isolation and Damping Techniques for Elevator Systems

2026 Best Ways to Control Noise and Vibration in Elevators
Isolation and Damping Techniques for Elevator Systems

Elevator noise often travels through more than the air. A traction machine can send vibration into its support beams, then through the building structure. Properly selected isolation mounts can interrupt that path. Their stiffness must match the equipment load; mounts that are too soft may allow movement or amplify vibration near a system’s resonant frequency. Small details matter.

Guide rails, brackets, and door operators can also transmit sound. Resilient interfaces may reduce vibration at mounting points, but rail alignment and secure fastening must remain precise. Inside the cab, damping layers behind wall panels can limit rattling and panel resonance. They will not fix a noisy guide shoe or a poorly adjusted door. Treating the source is usually more effective.

Measure before changing components. Compare vibration at the machine supports, rail brackets, and cab floor during travel, stopping, and door operation. A simple listening check helps, but it cannot reveal every vibration path. Results may vary with load and speed. A neat drawing can still miss a loose fastener or a worn roller. I would verify any isolation change with qualified elevator professionals, since added flexibility must not compromise alignment, safe operation, or maintenance access.

Maintenance and Testing for Long-Term Noise Control

Long-term elevator noise control depends on repeatable maintenance, not a single quiet ride. Keep a baseline for each elevator, including sound levels and vibration readings at consistent locations. Record the floor, travel direction, load, and operating conditions. A handheld meter can help track changes, but readings are only useful when taken consistently.

During scheduled inspections, qualified technicians can check guide shoes or rollers, rail joints, fasteners, bearings, door tracks, and vibration-isolation pads. Look for uneven wear, loose connections, or fresh marks where parts may be rubbing. Lubricate only as specified for the equipment; excess lubricant can attract dust and create new problems. That distinction is easy to miss.

Repeat tests after repairs and compare trends with earlier records. A brief rattle during door closing may point to a different issue than a low hum that grows during travel. Sound can also travel through the building structure, so the loudest spot may not be the source. Still, numbers can mislead. No log is perfect. Note unusual conditions, and investigate recurring changes rather than treating one normal reading as proof that the elevator is quiet.

2026 Best Ways to Control Noise and Vibration in Elevators - Maintenance and Testing for Long-Term Noise Control

Noise or Vibration Source Common Signs Inspection and Maintenance Control Measures Suggested Check Frequency Verification Method
Guide rails and car guide shoes or rollers Rubbing, squealing, or periodic vibration during travel; sound may change at particular floors. Check rail alignment, joints, fasteners, guide-shoe wear, and lubrication requirements. Clean rails where appropriate. Correct alignment and loose fixings; replace worn components; use only the lubrication specified for the equipment. At routine service visits; inspect sooner if noise or ride quality changes. Ride the car through its full travel and compare noise and vibration at the same locations with prior readings.
Traction machine, motor, and bearings New humming, whining, rumbling, or vibration that varies with speed or load. Check mounting bolts, bearing condition, cooling, drive settings, and signs of overheating or abnormal wear. Secure or repair mounts; correct drive or alignment issues; replace defective bearings or components according to service procedures. At routine service visits; trend temperature and vibration when symptoms are reported. Record sound and vibration during consistent travel conditions; compare results with manufacturer limits and the established baseline.
Brakes and stopping components Clunking, scraping, or a sharp noise when the elevator starts or stops. Inspect brake surfaces, clearances, linkages, fasteners, and stopping performance. Adjust or replace parts only in accordance with the service instructions; do not mask brake noise without finding its cause. At scheduled maintenance and after any abnormal stopping event. Observe repeated starts and stops under controlled conditions and confirm correct, consistent operation.
Door operator, rollers, tracks, and interlocks Rattling, scraping, slamming, or squeaking during door opening and closing. Check track cleanliness, roller wear, panel alignment, clearances, fasteners, and operator settings. Clean tracks; align panels; replace worn rollers; adjust closing speed and force within applicable safety requirements. At routine service visits; check promptly when door noise or operation changes. Cycle the doors several times and listen for consistent movement, full closure, and secure latching.
Hoist ropes or suspension components Periodic clicking, rubbing, or vibration that may be related to travel position. Inspect ropes, sheaves, guards, alignment, and related components using approved procedures. Correct alignment or replace worn parts as required; keep clearances and lubrication consistent with equipment instructions. At the intervals required by the maintenance plan and applicable regulations. Have qualified personnel assess the equipment and compare observations with inspection records and allowable limits.
Loose panels, fixtures, and car interior fittings Buzzing or rattling that occurs at certain speeds or when the car passes particular floors. Check ceiling panels, handrails, light covers, access panels, and other fittings for movement or loose fasteners. Resecure or isolate vibrating fittings with suitable materials that do not obstruct access, ventilation, or safety equipment. During routine car inspections; recheck after interior work or reported rattling. Run the elevator through its travel while checking each fitting for movement or contact noise.
Machine-room equipment and building structure Low-frequency hum or vibration transmitted into nearby rooms or corridors. Inspect equipment bases, anchorage, pipe or conduit contact, and potential vibration paths into walls and floors. Secure equipment; correct unintended contact; consider properly engineered isolation where compatible with equipment and safety requirements. At routine service visits and whenever adjacent-space complaints occur. Measure at the equipment and affected occupied area under repeatable operating conditions; document location and operating state.
General ride and noise baseline Gradual increase in cabin noise, vibration, or complaints with no obvious single source. Maintain dated records of service work, reported symptoms, operating conditions, and measurement locations. Investigate changes early; correct the underlying mechanical or installation issue rather than relying on sound masking. Establish a baseline after service or commissioning; repeat when symptoms change and during periodic condition reviews. Use a calibrated sound level meter for sound measurements and a suitable vibration meter for vibration checks; compare like-for-like conditions and applicable limits.

Note: Check frequencies are general planning guidance, not a substitute for the elevator manufacturer’s instructions, the site maintenance plan, or local regulations. Measurement conditions and acceptance limits should be defined for the specific installation by qualified personnel.

FAQS

What can a steady hum or rough whine near the elevator machine indicate?

Worn bearings may cause these sounds. Noise alone cannot confirm the exact fault.

Why might the elevator car shudder while moving?

Uneven guide-rail joints, loose brackets, or poor alignment can cause shuddering. Worn rollers may add a repeating rumble.

What causes rattling or scraping near the doors?

Dirt, damaged rollers, or a misadjusted door can create noise at each floor. Small sounds add up.

Why can a nearby room sound louder than the elevator?

Vibration may travel through support beams, walls, and floors. The sound can seem strongest away from its source.

What details should be recorded when elevator noise occurs?

Note when it happens, where it sounds loudest, and whether the car is moving or loaded. These details help narrow down possible causes.

Can isolation mounts reduce vibration from the machine?

Properly selected mounts can interrupt vibration traveling into support beams. Mount stiffness must match the equipment load.

Will damping layers inside the cab fix every noise?

No. They may reduce panel rattling, but they will not repair a noisy guide shoe or misadjusted door.

How should vibration be checked before changing components?

Compare measurements at machine supports, rail brackets, and the cab floor during travel and door operation. A listening check may miss a vibration path.

Why should elevator professionals verify isolation changes?

Added flexibility could affect alignment, safe operation, or maintenance access. I might focus too much on the hum; it is not proof.

Conclusion

How to control noise and vibration in elevators begins with identifying where unwanted sound and movement originate. Common causes include worn guide shoes or rollers, misaligned rails, loose fasteners, imbalanced rotating components, and noise transmitted through the hoistway or building structure. A careful diagnosis can combine listening during different operating conditions with inspections and measurements of vibration, alignment, and component wear. Finding the source first helps distinguish a mechanical fault from sound that is being amplified or carried through the building.

Effective control may involve adjusting and aligning moving parts, tightening connections, balancing equipment, and replacing worn components. Isolation mounts, resilient pads, and suitable damping materials can reduce the transfer of vibration into nearby structures, while careful installation prevents new noise paths. Long-term results depend on scheduled maintenance and repeat testing: technicians can track changes, address wear early, and confirm that adjustments remain effective. A consistent cycle of diagnosis, repair, isolation, and verification supports quieter, smoother elevator operation.

Charlotte

Charlotte

Charlotte is a seasoned marketing professional with a deep understanding of the company's portfolio and a passion for elevating its presence in the market. With a keen eye for detail and a commitment to excellence, she ensures that our professional blog is regularly updated with insightful articles......